


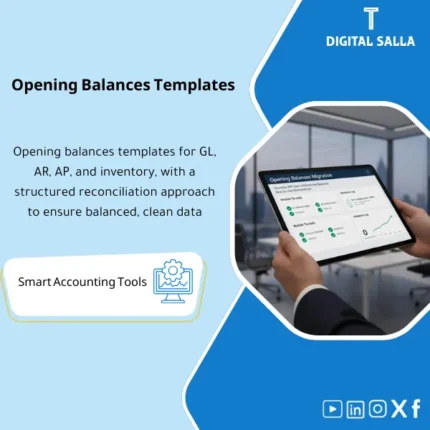
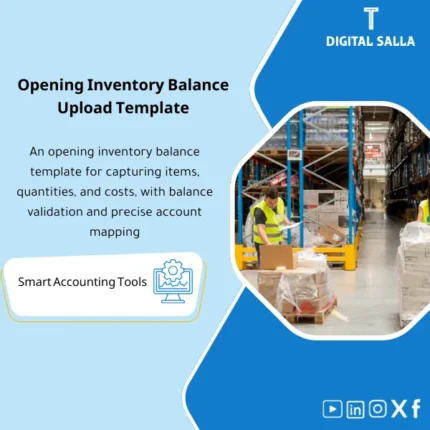
Inventory Opening Balance Template – Excel Template
55.59 $
Opening Inventory Balance Migration: Documents opening quantities and values by warehouse/location (with lot/serial where needed) and ties total value to the opening trial balance. Delivers an upload-ready file and a tie-out report to start ERP without opening variances.
Migration of Opening Inventory Balance
Excel template for preparing Inventory Opening Balance Template ready for download in ERP with a reconciliation tab (Qty/Value) and support for Lot/Serial
Value Proposition: Transform Migration of Opening Inventory Balance from “Inventory Sheets + Purchase Excel + Queries” into a single organized upload file, with Inventory Balance Reconciliation before Go‑Live (quantities + values) and a clear impact on opening entries.
Practically, the biggest risk in migrating inventory to ERP is not “uploading a file”; the risk is that the opening inventory balance appears correct in quantities but incorrect in values, or correct in the warehouse but incorrect in the Lot/Serial, leading to Go‑Live with discrepancies whose sources are unknown.
This template is designed to be a “upload file + reconciliation file + documentation file” at the same time.
In 20 seconds: What will you get?
- Excel Opening Inventory Balance with a clear upload structure: Item / Warehouse / Location / Qty / Cost / Value / (optional Lot/Serial).
- Support for migrating inventory quantities and values in the same file with validation rules to prevent common errors (negative/duplicate/mismatched unit of measure).
- Tab for Lot/Serial Migration (lots/serials/expiry date when needed) linked to the same Item and warehouse.
- Ready Validations list: Items not present in Master Data, UOM mismatch, Zero Costs, Undefined Locations.
- Inventory Balance Reconciliation tab: Tie‑out between total inventory value in the upload file and the inventory/count report + inventory account in GL (before and after upload).
- Exceptions Log to close discrepancies item by item before the upload day (Cutover).
- Concise Sign‑off page to document Snapshot Date and cost definitions and approvals.
The button is linked to the outputs: Upload File + Reconciliation Tie‑out + Exceptions Log + Sign‑off.
Suitable for
- ERP Finance Lead / GL Owner: Needs a clear Tie‑out between the opening inventory and the inventory account in GL before and after Go‑Live.
- Inventory/Cost Accountant: Wants to adjust quantity and value and document cost definitions (Unit Cost / Total Value) and handle exceptions.
- Warehouse/Supply Chain (with Finance): Preparing Snapshot of warehouses and Lot/Serial and closing discrepancies before upload.
Not Suitable for
- If you cannot define a clear Snapshot Date for inventory/balance (no Freeze or Cut-off point) — continuous discrepancies will appear that cannot be closed.
- If you expect the template to “create cost” without a source (no Unit Cost or Value) — the template documents and reconciles, it does not invent cost data.
Without the template / With the Opening Inventory Balance Migration Template
| Item | Without the Template | With the Template |
|---|---|---|
| Upload File Structure | Unfixed columns + Multiple sources | One structure: Qty/Value + Location + (Lot/Serial optional) |
| Lot/Serial Migration | Lot data uploaded manually or lost | Custom tab + automatic linking to Item/Warehouse |
| Inventory Balance Reconciliation | Last-minute Tie‑out + Unexplained discrepancies | Tie‑out (Qty/Value) + Exceptions Log + Sign‑off |
Before Use: 5 Symptoms That Inventory Migration is at Risk of Failure on Go‑Live Day
- Inventory numbers do not match the final inventory report and you do not know “which is correct” (Snapshot is undefined or multiple sources).
- Quantities are correct but the total value differs from the inventory account in GL without a clear explanation.
- Many items are rejected during upload due to Item not found/Location undefined/UOM mismatch.
- Lot/Serial is compiled in a separate file without clear linkage to the warehouse/item.
- There is no documentation file that can be submitted for internal review explaining where the balance came from and how the upload was approved.
How is the Opening Inventory Balance Migrated to ERP Practically?
The goal is not to “fill out a sheet,” but to arrive at an opening balance that can be uploaded and reconciles 3 things together:
(1) Inventory/Snapshot result, (2) Receipt/Difference record if any until the cut-off date, (3) Inventory value in GL or the final inventory report.
Therefore, the template is built as a workflow: Input → Validation → Exceptions → Tie‑out → Approval → Upload.
Application Method (3 Steps)
Step 1: Preparation and Gathering Reports (Cutover Inputs)
- Define Snapshot Date for the opening inventory.
- On-hand/Stock Count Result report by SKU and warehouse/location.
- Item Master list (Item Code, UOM, Item Status) + Warehouses/Locations/Bins (as per your system).
- Cost source: Unit Cost or Total Value for each Item/Warehouse (as per your inventory valuation policy).
- (If available) Lot/Serial/Expiry files to prepare Lot/Serial Migration in a loadable format.
Step 2: Filling + Cleaning + Linking
- Fill the Inventory Quantities and Values Migration template with standardized codes and unit of measure.
- Run Validations: Duplicates, negatives, Items not found, Undefined Locations, Zero Costs (as per the rules you adopt).
- Document every issue in the Exceptions Log and determine the action: Fix in source / Fix in Mapping / Justified exclusion.
- Fill the Inventory Opening Balance Template for Lot/Serial when needed and link it to the same Item/Warehouse.
Step 3: Reconciliation + Upload + Post-Upload
- Run the Inventory Balance Reconciliation tab: Total Qty/Value in the upload file against the inventory/count report + against GL (if part of the opening plan).
- Export the upload file in a format suitable for ERP (Excel/CSV) with columns matching the import interface.
- After upload: Extract the On-hand report from ERP and compare it with the same Pivot (Qty/Value) and close any Rejects.
- Issue Sign‑off: Upload date + final totals + list of closed exceptions + any related opening entries (if any).
Product Components (Clear Inventory)
-
Inventory Opening Balance Upload Sheet (Qty/Value)
- Practical Purpose: Compile the opening inventory balance for each Item/Warehouse/Location with its value and quantity in one upload structure.
- When to Use: Directly before Cutover and after Snapshot is established.
- Resulting Documentation: A clear upload file that can be reconciled number by number (Qty/Value) with its source.
-
Lot/Serial & Expiry Sheet
- Practical Purpose: Prepare Lot/Serial Migration and link it to the item and warehouse (and Expiry when needed).
- When to Use: For companies managed by lots/serials or products with expiry.
- Resulting Documentation: An opening Lot/Serial record traceable to inventory/files.
-
Mapping & Master Data Link (Items / Warehouses / UOM)
- Practical Purpose: Establish code references and link data sources to ERP codes (and convert units of measure if applicable).
- When to Use: During data cleaning and before exporting the upload file.
- Resulting Documentation: Mapping Table used as a reference for any subsequent review or re-upload.
-
Validation Rules Checklist
- Practical Purpose: Apply validation rules to prevent Rejects and material errors (Duplicates/Negative/Invalid Locations).
- When to Use: Before approving the file and before upload.
- Resulting Documentation: An internally signed checklist (Ready for Upload).
-
Exceptions Log
- Practical Purpose: Document data issues and close them item by item instead of “total discrepancies.”
- When to Use: From the first run until Go‑Live day.
- Resulting Documentation: Exceptions log with the status of each item (Open/Fixed/Accepted with Rationale).
-
Reconciliation & Tie‑out (Qty/Value)
- Practical Purpose: Reconcile total quantity and value before and after upload, linking it to the inventory/count report and inventory account in GL when needed.
- When to Use: Before upload (Pre‑load) and after upload (Post‑load).
- Resulting Documentation: Tie‑out Report that can be submitted for internal/external review as part of the Cutover file.
-
Sign‑off Page (Opening Balance Approval)
- Practical Purpose: Document Snapshot Date, cost source, total Qty/Value, and approver’s responsibility.
- When to Use: After closing exceptions and before final upload.
- Resulting Documentation: Approval page suitable as part of the Go‑Live Readiness Pack.
What Should Be Included in the Delivery?
- Main Excel File including tabs: Upload (Qty/Value) / Lot-Serial / Master Data Mapping / Validations / Exceptions / Reconciliation (Pre & Post) / Sign‑off.
- Export Template (CSV Ready) or “Export View” page with columns arranged according to the import interface in ERP.
- Short Runbook: Where to place inventory data? How to run the Validations? How to export the upload file? What to review after upload?
- Proposed Archiving Structure: Snapshot Sources / Upload Files / Post‑Load Reports / Sign‑offs / Exceptions History.
- Accounting/Operational Definitions: Snapshot Date, cost definition (Unit Cost vs Total Value), policy for handling unvalued items.
After Implementation (Two Points Only)
- Operational Outcome for the Team: The upload day becomes “a short and explained Rejects list” instead of reformatting files every time; because the file is standardized and validation rules are already working.
- Control/Audit Outcome: Any total opening inventory (Qty/Value) has a clear Trace: Snapshot source + Mapping + Closed Exceptions + Tie‑out before/after upload + Sign‑off.
FAQ — Questions Before Purchase
Is the template suitable for any ERP system?
Yes, because it is a data preparation template. You will only need to adjust the names/order of the columns to match the import interface in your system (Excel/CSV).
Does it support multiple warehouses and locations?
Yes. The structure is built on Item + Warehouse/Location (and Bin/Zone when needed if your system requires it).
Does it include Lot/Serial and Expiry?
Yes, there is a dedicated tab for Lot/Serial Migration linked to the same item and warehouse, with expiry fields if they are part of your operational policy.
What is the minimum data required to create a loadable opening balance?
Item Code + Warehouse/Location + Quantity + (Unit Cost or Total Value) + Snapshot Date. Without cost/value, you will be able to upload quantities but will face issues reconciling values and calculating inventory.
How do I handle items with zero cost or uncertain cost?
The template will flag them as exceptions. The decision is clear: (1) Complete the cost source, or (2) Accept them temporarily with documented impact, or (3) Exclude them from upload until data is corrected — as per your company policy.
Does the template automatically calculate FIFO layers?
The template focuses on “a loadable balance that can be reconciled.” If your system requires detailed cost layers/batches, they can be represented through the Lot/Batch tab or by splitting the balance into batches, provided the data is available from the source.
Is there a section for reconciliation with GL?
Yes, the Inventory Balance Reconciliation tab supports Tie‑out between total Value in the upload file and the inventory/count report, and a comparison with the inventory account in GL can be added as part of the opening plan (as per your COA).
Is it suitable for the opening entry only or can it be reused later?
It is primarily used for Go‑Live, but it can be reused when migrating a new warehouse/branch or re-uploading after inventory restructuring.
If you want Go‑Live without “unexplained” inventory discrepancies
Outputs: Upload Template + Validations + Exceptions + Reconciliation Tie‑out + Sign‑off.
| المسمّى الوظيفي | |
|---|---|
| Duration | |
| المستوى | |
| التحديثات | |
| القطاع | |
| الصيغة |


Reviews
Clear filtersThere are no reviews yet.